Children’s Sensory Activities

Here is a collection of recipes to have some fun and interactive sensory play with your child. I got these from my mother who used to be a preschool teacher. One of the more popular recipes in her class was the “Flubber” recipe.

Have fun playing and learning with your kid!

Flubber

children's sensory activity
Servings 0

Ingredients
  

  • 2 cups white glue
  • 1.5 cups tepid water
  • food coloring
  • 1 cup water
  • 2 tsp borax

Instructions
 

  • In a large bowl, mix together the white glue, tepid water, and food coloring.
  • In a seperate container, mix together the water and borax.
  • Pour the borax-water solution into the glue mixture a third at a time.
  • Mix with spoon after each addition.
  • Remove any globs as the form.
  • Knead on a table surface until all the excess water is absorbed into each blob
  • Have fun poking, pinching, pulling apart, rolling, bouncing, folding, using with playdoh toys, melting over hands or objects, blowing bubbles with straws.
  • Store in a plastic container.
Tried this recipe?Let us know how it was!

Goop

children's sensory activity
Servings 0

Ingredients
  

  • 1 box Cornstarch
  • Water
  • Food Coloring
  • Objects to hide

Instructions
 

  • Add the whole box of cornstarch to a bowl
  • Slowly add a little over a cup of water.
  • Stire the mixture to make it goopy but not runny.
  • Add color to you goop.
  • Hide objects in the goop for children to find.
Tried this recipe?Let us know how it was!

Cooked Playdough

children's sensory activity
Servings 0

Ingredients
  

  • 3 cups Flour
  • 3 cups Water
  • 1.5 cups Salt
  • 1 tbsp Cream of Tartar
  • 2 tbsp Cooking Oil
  • Food Coloring
  • scents or additions see below

Instructions
 

  • Combine the ingredients in a large pot.
  • Additions:
    You can add delicious smells such as cinnamon or ground cloves.
    You can add glitter for sparkle.
  • Cook over low heat until it becomes firm.
  • Remove from heat and knead the mixture.
  • Store in a plastic container.
Tried this recipe?Let us know how it was!

Kool-Aid Playdough

children's sensory activity
Servings 0

Ingredients
  

  • 3 cups Flour
  • 1 cup Salt
  • 1 tsp Cream of Tartar
  • 3 cups Water, boiling
  • 2 packages Kool-Aid, unsweetened
  • 4 tbsp Cooking Oil

Instructions
 

  • Combine the dry ingredients in a large bowl.
  • Add the boiling water and stir the mixture.
  • Knead the mixture well until it is the consistency of playdough.
  • Store it in a plastic container.
Tried this recipe?Let us know how it was!

Oatmeal Playdough

children's sensory activity
Servings 0

Ingredients
  

  • 1 part Flour
  • 1 part Water
  • 2 parts Oatmeal
  • Food Coloring

Instructions
 

  • Mix together the flour and oatmeal.
  • Add the water slowly until the mixture is blended.
  • Cornmeal can be used instead of oatmeal to vary the texture.
Tried this recipe?Let us know how it was!

Cornstarch Clay

children's sensory activity
Servings 0

Ingredients
  

  • 1 cup Cornstarch
  • 2 cups Baking Soda
  • 1.5 cups Water
  • food coloring

Instructions
 

  • Mix together the cornstarch, baking soda, and water.
  • Cook over medium heat stirring constantly.
  • When the mixture reaches the consistency of soft mashed potatoes, remove to a plate and cover with a damp cloth until cool.
  • Knead until smooth
  • Clay dries quickly and is quite durable when coated with acrylic spray.
    Great for hand prints!
Tried this recipe?Let us know how it was!

Rainbow Mashed Potatoes

children's sensory activity
Servings 0

Ingredients
  

  • 1/3 cup sugar
  • 1 cup Cornstarch
  • 4 cups water
  • food coloring

Instructions
 

  • Mix together the sugar, corn starch, and water and cook over medium heat until the mixture thickens and turns transparent.
  • Let it cool and transfer to ziplock bags.
  • Choose a couple compatible colors and add several drops of food coloring to the bags.
  • Seal the bags with wide duct tape.
  • Encourage children to mix the colors as they play with the bags.
Tried this recipe?Let us know how it was!

Cloud in a Bag

children's sensory activity
Servings 0

Ingredients
  

  • shaving cream
  • food coloring

Instructions
 

  • Fill a plastic baggie with shaving cream.
  • Add food coloring
  • Squeeze out all of the air and seal the bag
  • Children mix color into that shaving cream as the squeeze the bag
Tried this recipe?Let us know how it was!

Puffy Paint

children's sensory activity
Servings 0

Ingredients
  

  • 1 cup Salt
  • 1 cup Flour
  • 1 cup Water
  • Food Coloring

Instructions
 

  • Mix together all of the ingredients.
  • Put it into squeeze bottles.
  • Drip the paint onto heavy paper or cardboard
Tried this recipe?Let us know how it was!

Magic Milk

children's sensory activity
Servings 0

Ingredients
  

  • 1 cup whole milk
  • Dawn dishwashing liquid
  • food coloring

Instructions
 

  • Pour room temperature milk into a bowl
  • Add a few drops of food coloring
  • Add dishwashing liquid
  • Watch the milk magically swirl
Tried this recipe?Let us know how it was!

Gelly Bags

children's sensory activity
Servings 0

Ingredients
  

  • 1 Zip lock bag
  • tape
  • hair gel

Instructions
 

  • Fill a ziplock bag with hair gel and seal with tape.
  • Children can write or draw on the bag
Tried this recipe?Let us know how it was!

Citrus Beet Salad

I get it… Not everyone likes beets. If you’re one of those odd folks that don’t, well go ahead and skip over to the next recipe. If you are like us though, this is one recipe that you will want to give a try. This salad would be perfect to serve chilled on a hot afternoon or summer day.

My wife and I really loved this recipe. It is quick to make (if using pre-cooked beets) and I could get it all thrown together in minutes while she watched the baby. A quick-and-easy and healthy meal is a win-win in our house. The mint and citrus really help to balance the earthy flavor of beets. The goat cheese added some heartiness to the dish, and really helped to tie all of the flavors together.

Citrus Beet Salad

Course Dinner, Lunch, Salad, Side Dish
Cuisine American
Servings 4 serving
Calories 474 kcal

Ingredients
  

  • 4 large Beets you can instead buy a container of pre-cooked beets to expedite the making of the salad
  • 5 Tangerines or Clementines separated into sections
  • 1 small Red Onion finely chopped. (optional)
  • 1 bunch Mint chopped
  • 1½ cup Goat cheese crumbled
  • 2 Tbsp Olive oil

Instructions
 

  • (If you purchased pre-cooked beets, skip to the next step.)
    Add the beets to a large pot of boiling water. Simmer until tender, about 40 minutes. Let cool.
  • Peel (if not pre-cooked) and cut into 1/2-inch cubes.
  • Add the tangerine segments, onion, mint and olive oil.
  • Gently mix together and serve.

Notes

Original recipe: https://www.food.com/recipe/citrus-beet-salad-375873

Nutrition

Calories: 474kcalCarbohydrates: 43gProtein: 21gFat: 26gSaturated Fat: 14gCholesterol: 39mgSodium: 529mgPotassium: 1135mgFiber: 10gSugar: 32gVitamin A: 1761IUVitamin C: 45mgCalcium: 212mgIron: 4mg
Keyword Beets, Citrus, Salad
Tried this recipe?Let us know how it was!

Simple Coleslaw

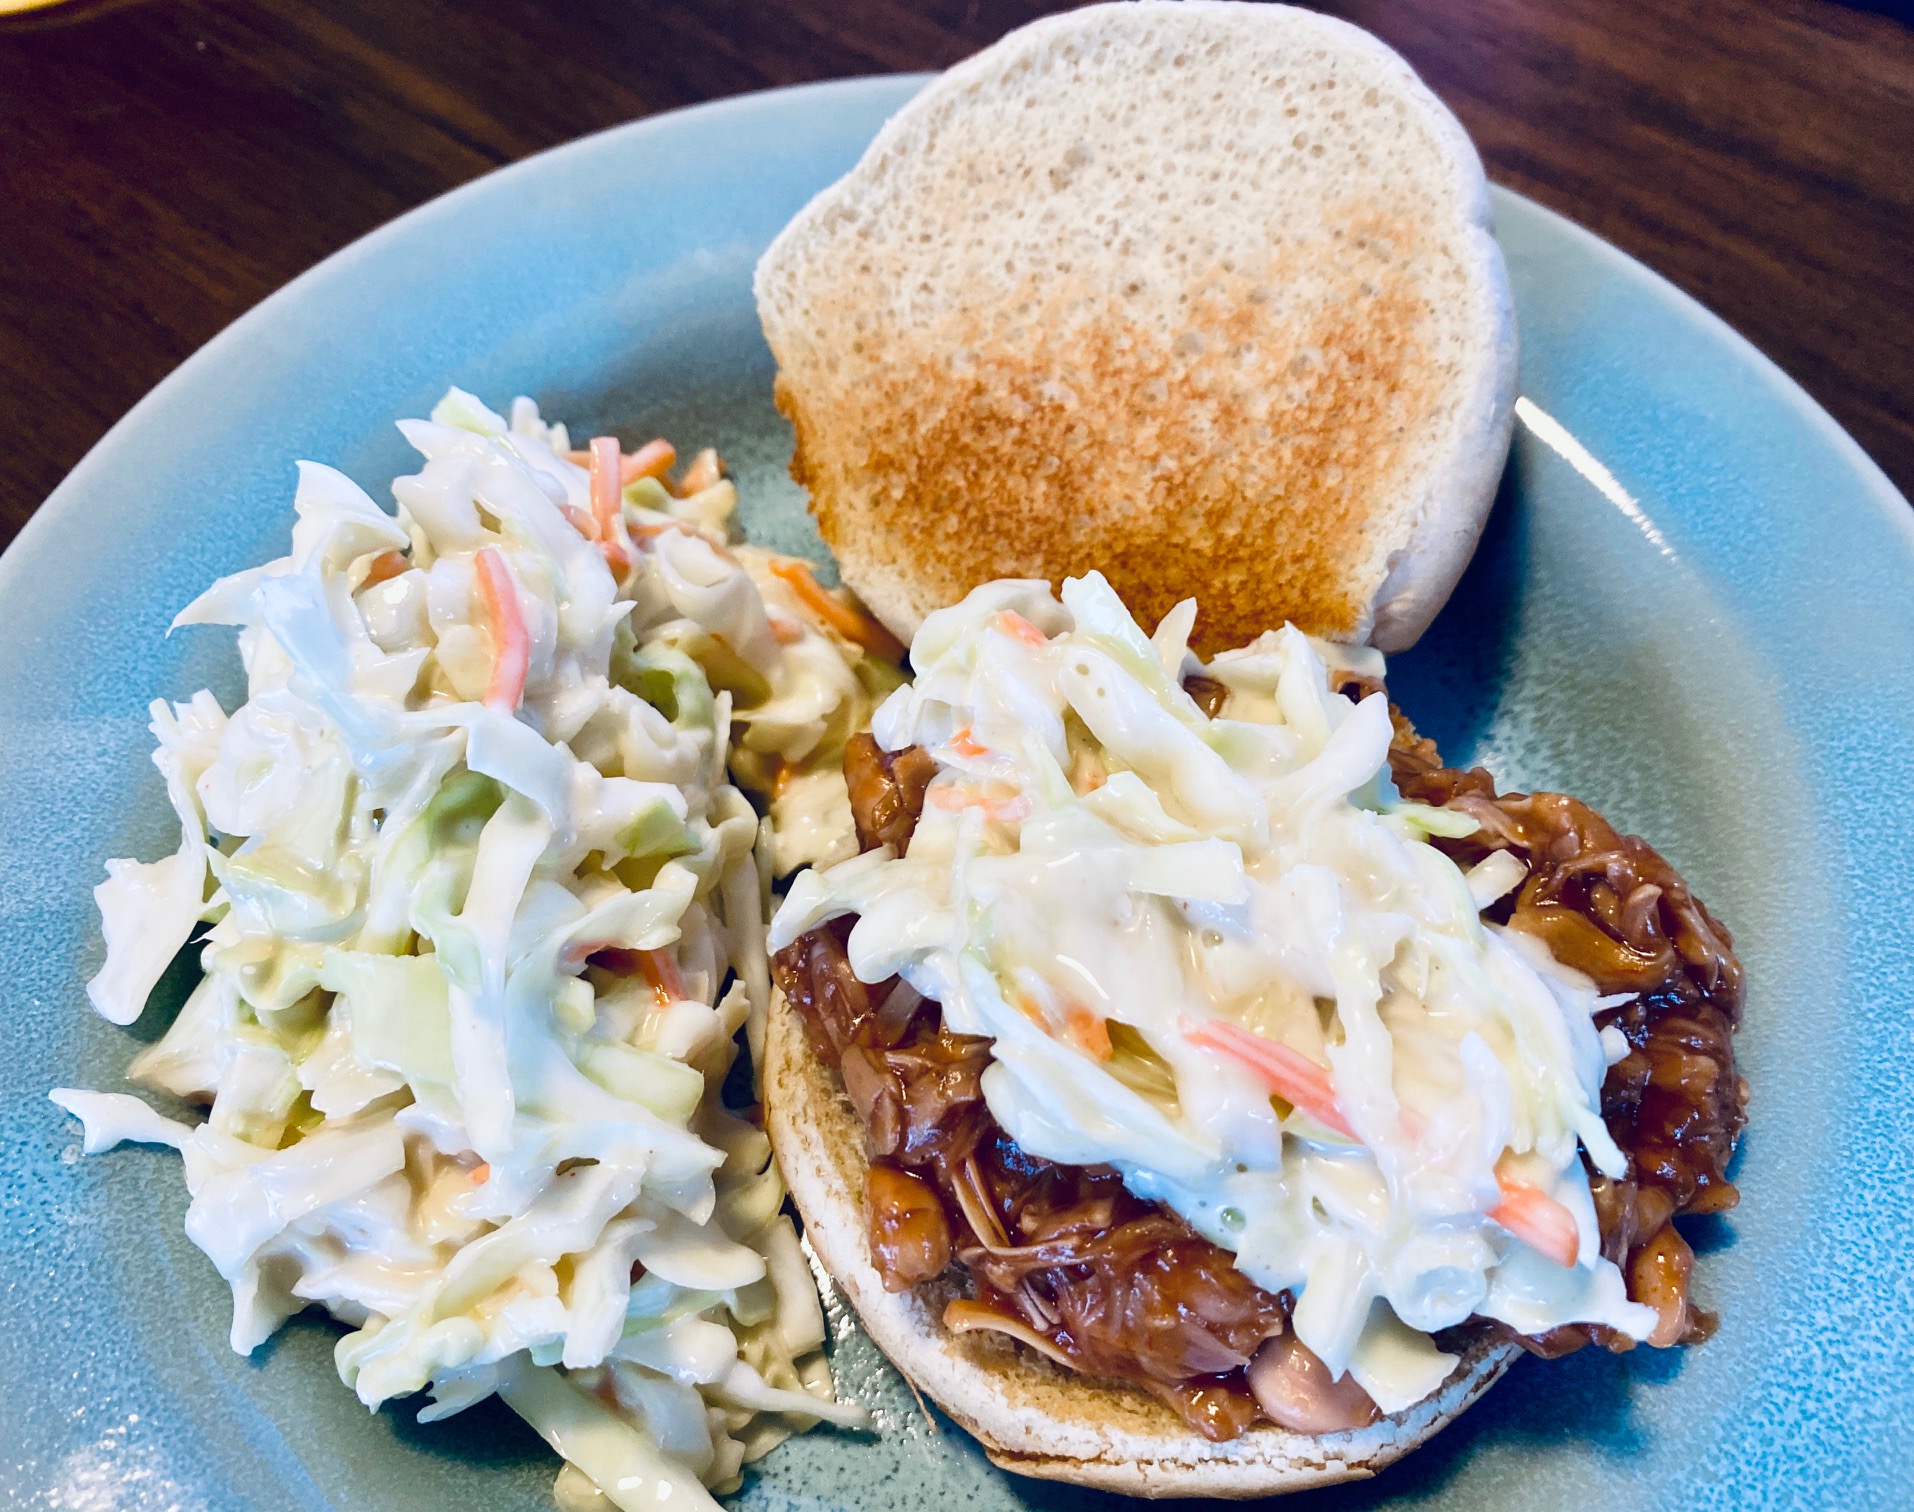
This is a very simple, four ingredient, coleslaw recipe. It can be a solid base recipe if you want to doctor it up to you own liking, check out some of the add-in options I list at the end of the recipe.

It only takes a few minutes to whip together, and is a perfect side to any BBQ or pool party. My favorite time to make this is whenever I cook up a batch of Instant Pot BBQ jackfruit, and to turn it into a delicious sandwich.

Simple Coleslaw

Course Salad, Side Dish
Cuisine American
Servings 0

Ingredients
  

  • 1 14oz pkg Coleslaw Mix
  • 1/2 cup Mayonnaise
  • 1.5 Tbsp Apple Cider Vinegar
  • 1.5 Tbsp Honey or granulated sugar
  • Salt to taste
  • Ground Black Pepper to taste

Instructions
 

  • In a small bowl, mix together the mayonnaise, honey, apple cider vinegar, and a pinch or two of salt & pepper to taste.
  • Add Coleslaw mix to a medium sized bowl and slowly pour mayonnaise mixture over it. Toss all of it together until evenly coated. Can be served immediately, though we prefer to let it sit in the refrigerator for a couple hours.

Notes

Other ideas to mix include: almond slices, apples, bleu cheese, dried cranberries, fresh strawberries, or poppy seeds.
 
Original Recipe: https://www.cookingclassy.com/coleslaw-recipe/
Keyword Coleslaw, Salad, Slaw
Tried this recipe?Let us know how it was!

Tofu Tacos

One of my vegetarian co-workers shared this recipe with me. I figure I’d give it a shot, and to be honest… It was really tasty! There is lots of flavor from all the spices and the tofu ends up having an almost meaty texture, similar to crumbled beef. Baking it I feel is what really makes it work, as it helps to dry out the tofu. I could easily eat these any day of the week and not miss the “real” meat.

Tofu Tacos

Prep Time 10 minutes
Cook Time 40 minutes
Course Main Course
Cuisine Mexican
Servings 2 people

Ingredients
  

  • 14 oz extra firm tofu 1 block, drained
  • 3 tablespoons low sodium soy sauce
  • ¼ cup tomato sauce
  • 2 teaspoons chili powder
  • 2 teaspoons garlic powder
  • 1 teaspoon cumin
  • ½ teaspoon black pepper
  • 1 pinch cayenne
  • olive oil for drizzling
  • 4 small corn tortillas

Instructions
 

  • Preheat the oven to 400ºF (200ºC).
  • Use your hands to crumble the tofu into a medium bowl. Add the soy sauce, tomato sauce, chili powder, garlic powder, cumin, pepper, and cayenne and stir until well-combined.
  • Add a drizzle of olive oil to a large baking sheet. Transfer the tofu to the baking sheet, using a spatula to spread it out as much as possible.
  • Bake for 20-25 minutes, stirring halfway through, until golden brown and slightly crispy.
  • Fill the tortillas with the tofu, lettuce, tomato, shredded cheese, and guacamole.

Notes

Original recipe: https://tasty.co/recipe/tofu-tacos
Keyword Vegetarian
Tried this recipe?Let us know how it was!

Miso Maple Roasted Veggies

You are going to love these! The taste of miso and maple really bring out something special in the roast vegetables. These disappear fast in our house, we all go back for seconds. Sometimes we just make a huge batch and eat it as our main course.

The original recipe called for canola oil, but we found that by blending it half-half with sesame oil, or just using all sesame oil that the flavor was much better! Also while the original recipe called for root vegetables, you can sub almost any of your preferred veggies into it.

Miso-Maple Roasted Vegetables

Prep Time 15 minutes
Cook Time 40 minutes
Total Time 55 minutes
Course Side Dish
Servings 4 servings

Ingredients
  

  • 2 pounds root vegetables cut in roughly 1/2-inch pieces
  • 2 tablespoons miso paste see above
  • 2 tablespoons maple syrup or honey, if you prefer
  • 2 tablespoons rice vinegar
  • 1 tablespoon soy sauce
  • 2 tablespoons Sesame Oil Any avocado or canola oil will work

Instructions
 

  • Preheat the oven to 425 degrees F. Line a baking sheet with parchment paper (or just oil it).
  • Chop your veggies in roughly equally sized chucks. Half-inch pieces work great.
  • Whisk together the miso, maple syrup, rice vinegar, soy sauce, and oil.
  • Toss the sauce with the cut-up root vegetables, coating them well. Transfer to the baking sheet.
  • Roast, turning them periodically, for 30 to 40 minutes, or until they are soft (but not mushy) and caramelized.

Notes

Root vegetables work great in this recipe, but don’t be afraid to try other veggies you like. Things like carrots, parsnips, potatoes, cauliflower, and broccoli all taste great with this recipe. We also liked the taste of everything better when used sesame oil.
Original recipe: https://food52.com/recipes/26507-miso-maple-roasted-roots
Keyword Maple Syrup, Miso, Vegetarian
Tried this recipe?Let us know how it was!

Instant Pot Jackfruit Carnitas

After the taste bud nirvana of making the BBQ jackfruit i was up for trying more jackfruit recipes. So, since I love mexican food, i figured that carnitas would be a great idea to try.

I honestly was not disappointed. These tasted so good! The secret though is in finishing them in the oven to get that little bit of crispness in them as pressure cooking alone doesn’t give that.

Instant Pot Jackfruit Carnitas

Prep Time 10 minutes
Cook Time 4 minutes
NPR 10 minutes
Course Main Course
Cuisine Mexican
Servings 0

Ingredients
  

  • 2 20oz Cans green jackfruit packed in water or brine
  • 1 red onion chopped
  • 5 cloves garlic minced
  • 1 tablespoon ground cumin
  • 1 tablespoon nutritional yeast
  • 1 tablespoon smoked paprika
  • 2 teaspoons dried oregano
  • 1/2 teaspoon freshly ground black pepper
  • 1 bay leaf
  • 1/3 cup orange juice
  • 1/4 cup lime juice
  • 3 tablespoons soy sauce or gluten-free tamari
  • 2 tablespoons tomato paste
  • 1 tablespoon liquid smoke
  • 1 teaspoon sambal oelek

Instructions
 

  • Rinse and drain the jackfruit, then use your fingers to pull the pieces apart so that it looks like shredded pork.
  • Add the shredded jackfruit, along with the rest of the ingredients to the Instant Pot and stir to combine. Secure the lid, close the pressure valve, and cook for 4 minutes at high pressure. Let the pressure release naturally for 10 minutes, then switch the valve to “venting” to quick release.
  • Give everything another stir and remove and discard the bay leaf. At this point you can serve the jackfruit carnitas or store it in an airtight container in the refrigerator for up to 7 days.
  • Recipe Suggestions
  • Some people discard the harder core and seeds of the jackfruit. I do not. I find that if you do your best to tear everything up, it all cooks up nicely and you won’t even notice those parts. Why waste?
  • If you want to crisp up the edges to be even more like carnitas, you can spread the jackfruit on a parchment lined baking sheet and put it under the broiler for 10 minutes, stirring it at the halfway mark. The edges of the jackfruit will start to brown and crisp up.

Notes

Original recipe: https://www.lafujimama.com/instant-pot-jackfruit-carnitas/
Keyword Instant Pot, Vegetarian
Tried this recipe?Let us know how it was!

Instant Pot BBQ Jackfruit

Oh man! I was kinda hesitant to try this one at first. Jackfruit just wasn’t a fruit either of grew up around when we lived on the mainland. Since living in Hawaii, it’s definitely been “around” more. That still doesn’t quite directly translate to having experience handling or cooking it. That will be changing though! Bring on the jackfruit!

Jackfruit itself can be a huge pain-in-the-ass to process from it’s fresh fruit state. However, finding it canned and brined has been a game changer that makes cooking with it fast and easy. We’ve been finding it at our local natural foods grocery store, Asian markets, and everyone’s favorite Trader’s Joes.

We’ve also been noticing it pop up more and more either as whole fruit or in dishes or products at farmers markets and farm type events. Which has been a great way to try it prepared different ways. I have been amazed and converted to a true fan by how well jackfruit does as a meat alternative. If someone was to hand me a sandwich using this recipe at a BBQ, I probably won’t notice that it was really meat until I was told. I would most likely fail a blind taste test, and honestly might even lean more towards the jackfruit in a blind taste test.

If you’re vegetarian, vegan, or just want to try something new on a meatless monday – Give this recipe a shot!

Instant Pot BBQ Jackfruit

Prep Time 5 minutes
Cook Time 5 minutes
NPR 5 minutes
Total Time 15 minutes
Course Main Course
Cuisine American
Servings 6 Servings

Ingredients
  

6 hamburger buns (gluten free if needed)

  • 2 20oz. can Jackfruit (in brine or water)
  • 18 oz. Barbecue sauce
  • 6 Hamburger buns
  • coleslaw

Instructions
 

Prepare your jackfruit: Drain and rinse the canned jackfruit.

If desired, chop off the "core" portions and discard, we usually leave them though.

    Add the jackfruit to the Instant Pot along with 1 cup of water. Put on the lid, seal, and set to high pressure for 5 minutes. Allow the pressure to release naturally, or if you are in a hurry you can manually release the pressure (carefully).

      Drain the jackfruit, and then add it back to the Instant Pot. Mash with a potato masher until it resembles pulled meat (see photo above).

        Make the barbecue sauce following these instructions (unless you are using store bought sauce).

          Add the barbecue sauce to the pulled jackfruit, and turn on the saute feature. Cook for 2-5 minutes until warmed through. Serve on buns with shredded cabbage.

            Notes

            Original recipe: https://www.noracooks.com/instant-pot-pulled-bbq-jackfruit/
            Keyword BBQ, Instant Pot, Vegetarian
            Tried this recipe?Let us know how it was!

            Chocolate Peanut Butter Quinoa Balls

            So this is one of Traci’s recipes for a healthy snack. I’ll let her tell you more about them later. 

            Chocolate Peanut Butter Quinoa Balls

            Course Breakfast, Snack
            Cuisine American
            Servings 0

            Ingredients
              

            • 1/2 cup Peanut Butter
            • 2 tbsp Maple Syrup, pure use the real stuff, not the imitation maple junkl
            • 1 tsp Vanilla Extract
            • 1 dash Salt
            • 1 cup Quinoa, cooked slightly warm, not hot
            • 2 tbsp Chocolate chips

            Instructions
             

            • Line a half baking sheet or plate with parchment paper and set aside.
            • In a bowl, add peanut butter, maple syrup, vanilla extract, and salt. Mix until thoroughly combined. Stir in Quinoa and mix until well combined. Fold in chocolate chips.
            • Take a heaping spoonful size of dough and roll it into a ball. Place onto the prepared parchment paper. Do the same until no dough remains.
            • Place in the refrigerator or freezer to chill for about 30 minutes.
            • Store in an air tight container in the freezer or refrigerator.
            Tried this recipe?Let us know how it was!

            Roast Chicken Over Curry Quinoa Salad

            This recipe was another great find from the FreshBox meal service. We enjoy it so much that we decided to hang on to it. 

            Roast Chicken Over Curry Quinoa Salad

            Servings 3 servings

            Ingredients
              

            • 2 Chicken breasts
            • 1/2 cup Quinoa
            • 1 bunch Kale
            • 1/2 Cucumber
            • 1 Persimmon
            • 1 bunch Dill
            • 1/4 tsp Curry Powder
            • Olive oil
            • Black pepper

            Instructions
             

            • Rinse your produce well under cold water. Remove the rib from the kale leaves and discard. Tear the leaves into large pieces. Bring large pot of salted water to a boil. Cook the kale leaves for 2-3 minutes. Drain well and set aside.
            • In a separate pot, combine the quinoa with 1 cup of water, curry, and salt. Cover the pot, bring it to a boil, then reduce the heat to low and simmer for 20 minutes or until the quinoa is cooked. Fluff with a fork and set aside. Set oven to a broil at 500 degrees of highest temp.
            • Trim the top off the persimmon and dice it into bit size pieces. Toss with 1 tsp of oil and spread on a lined tray. Broil for 10 minutes or until just soft. Cut the cucumber into bite size pieces. Finely chop 1 tbsp of dill
            • Toss together the quinoa, kale, persimmons, cucumbers, and dill in a bowl. Taste to check seasoning, add salt and pepper if needed, if it’s dry add some oil.
            • Season your chicken with salt and pepper. Broil the chicken for 4 minutes on each side. Serve hot with the curried quinoa salad and enjoy!

            Notes

            Original recipe: FreshBox meal recipe
            Tried this recipe?Let us know how it was!

            Garlic Roasted Broccoli

            How can anyone hate broccoli? I think it’s really tasty and that fact that it is such healthy vegetable makes it even better. The easiest way to bring out the full flavor of broccoli is to simply roast it in the oven. Tossed with some oil and seasoning and baked, you’ll have a hearty delicious side dish in 20 minutes. 

            Substituting garlic oil for the oil and garlic, is a great way to cut out the actual garlic but keep that flavor. It’s a great way to make this fairly FODMAP safe.

            Garlic Roasted Broccoli

            Prep Time 5 minutes
            Cook Time 20 minutes
            Total Time 25 minutes
            Course Side Dish
            Cuisine American
            Servings 3 servings

            Ingredients
              

            • 12 ounces Broccoli florets
            • 2 tablespoons Olive oil
            • 3 teaspoons Garlic powder
            • Kosher salt (2 teaspoons) to taste
            • Black pepper to taste
            • Parmesan cheese to taste

            Instructions
             

            • Preheat oven to 425 degrees F
            • Place your broccoli in a gallon size ziptop bag
            • In a small bowl, combine oil, powder, and salt (pepper if using)
            • Pour liquid mixture over the top of the broccoli
            • Shake until broccoli is fully covered
            • Pour broccoli out on to a greased cookie sheet, covered in aluminum foil
            • Bake for 20 minutes
            • Remove from oven. Sprinkle with additional salt, parmesan cheese if desired.
            • Serve immediately
            Tried this recipe?Let us know how it was!